Category: Suspension
Categories
nsxb18026a.pdf
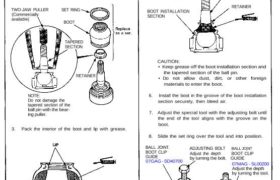
Knuckle/Control Arms/Compliance Pivot Ball Joint Boot Replacement NOTE: Do not damage the tapered section of the ball pin with the bear- ing puller. 3. Pack the interior of the boot and lip with grease. BOOT INSTALLATION SECTION CAUTION: Do not contaminate the boot installa- tion section with grease. 4. Wipe the grease off the sliding […]
Categories
nsxb18044b.pdf

Rear Damper Installation 1. Reposition the damper assembly between the frame and knuckle. 2. Install the stabilizer link and connect the stabilizer bar. 3. Loosely install a new self-locking nut. 4. Hold the ball pin of the stabilizer link with a hex wrench, then tighten the self-locking nut. 5. Loosely install a new damper mounting […]
Categories
nsxb18030a.pdf
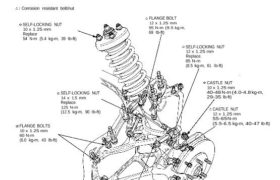
Rear Suspension Torque Specifications CAUTION: • Replace the self-locking nuts after removal. • Replace the self-locking bolts if you can easily thread a non-self-locking nut past their nylon locking inserts. (It should require 1 N-m (0.1 kg-m, 0.7 Ib-ft) of torque to turn the test nut on the bolt). • The vehicle should be on […]
Categories
nsxb18021a.pdf
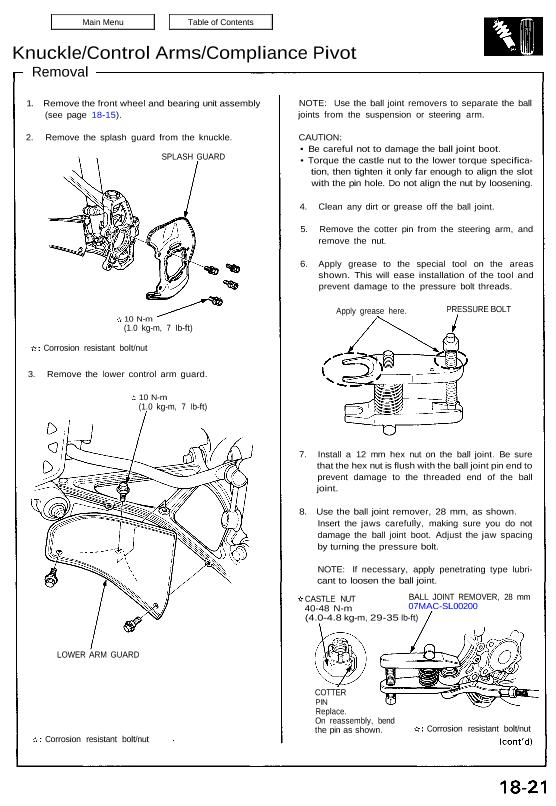
Removal 1. Remove the front wheel and bearing unit assembly (see page 18-15). 2. Remove the splash guard from the knuckle. SPLASH GUARD 10 N-m (1.0 kg-m, 7 Ib-ft) Corrosion resistant bolt/nut 3. Remove the lower control arm guard. 10 N-m (1.0 kg-m, 7 Ib-ft) LOWER ARM GUARD Corrosion resistant bolt/nut NOTE: Use the ball […]
Categories
nsxe18011a.pdf
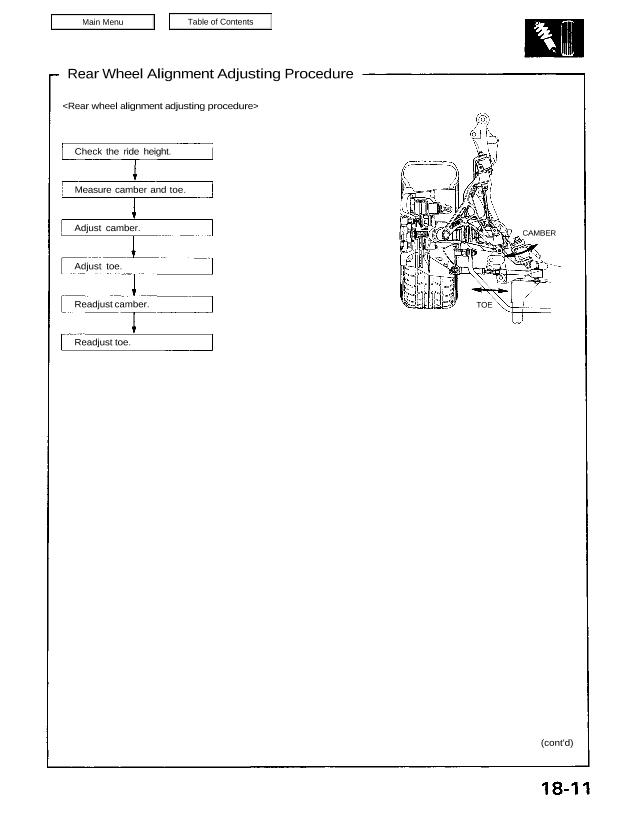
Rear Wheel Alignment Adjusting Procedure Check the ride height. Measure camber and toe. Adjust camber. Adjust toe. Readjust camber. Readjust toe. CAMBER TOE (cont’d) Wheel Alignment Rear Wheel Alignment Adjusting Procedure (cont’d) NOTE: NSX four wheel alignment requires the use of equip- ment designed specifically for four wheel indepen- dent suspensions and capable of immediate […]
Categories
nsxb18036a.pdf
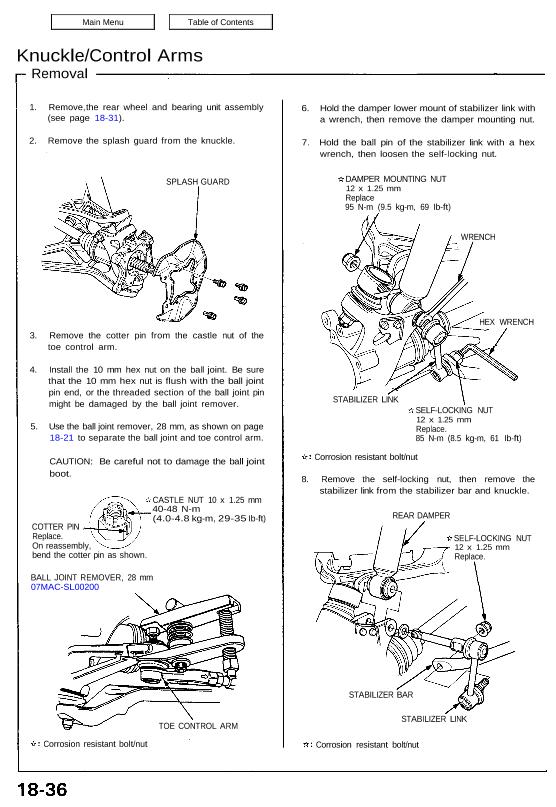
Knuckle/Control Arms Removal 1. Remove, the rear wheel and bearing unit assembly (see page 18-31). 2. Remove the splash guard from the knuckle. SPLASH GUARD 3. Remove the cotter pin from the castle nut of the toe control arm. 4. Install the 10 mm hex nut on the ball joint. Be sure that the 10 […]
Categories
nsxe18007a.pdf

Front Wheel Alignment Adjusting Procedure Adjustment NOTE: NSX four wheel alignment requires the use of equipment designed specifically for four wheel independent suspensions and capable of immediate feedback. The NSX suspension can be adjusted for camber, caster (front only), and toe. However, because each of them relates to the other, the camber changes when the […]
Categories
nsxd18015a.pdf
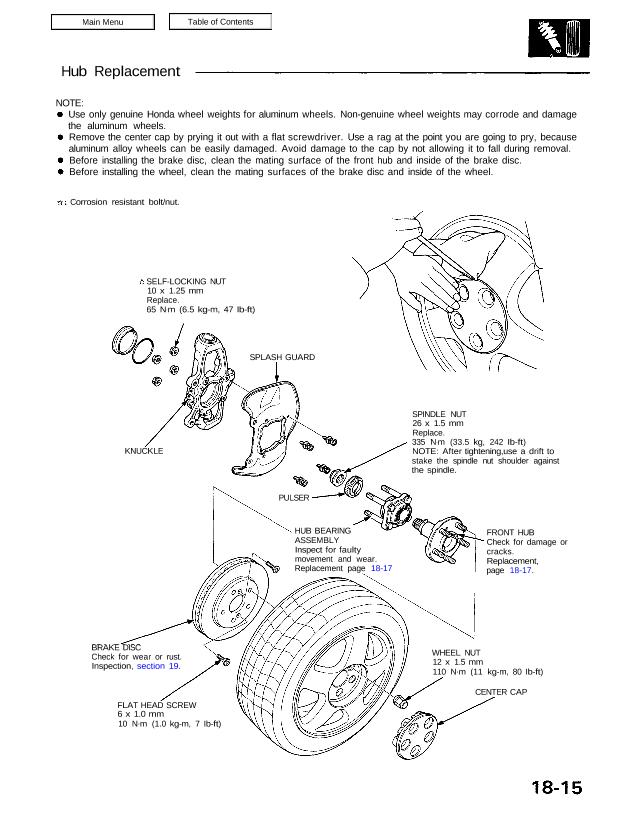
Hub Replacement NOTE: Use only genuine Honda wheel weights for aluminum wheels. Non-genuine wheel weights may corrode and damage the aluminum wheels. Remove the center cap by prying it out with a flat screwdriver. Use a rag at the point you are going to pry, because aluminum alloy wheels can be easily damaged. Avoid damage […]
Categories
nsxd18031a.pdf
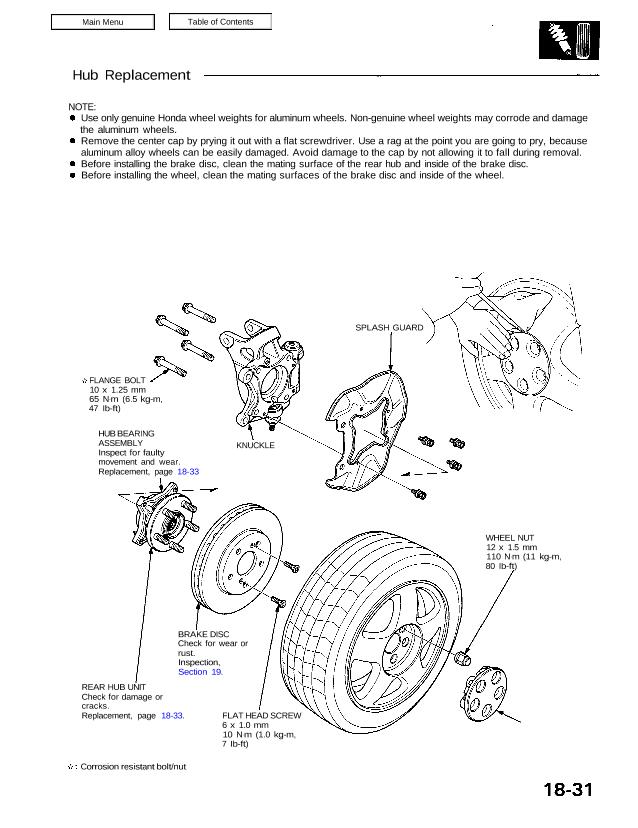
Hub Replacement NOTE: Use only genuine Honda wheel weights for aluminum wheels. Non-genuine wheel weights may corrode and damage the aluminum wheels. Remove the center cap by prying it out with a flat screwdriver. Use a rag at the point you are going to pry, because aluminum alloy wheels can be easily damaged. Avoid damage […]
Categories
nsxb18010a.pdf
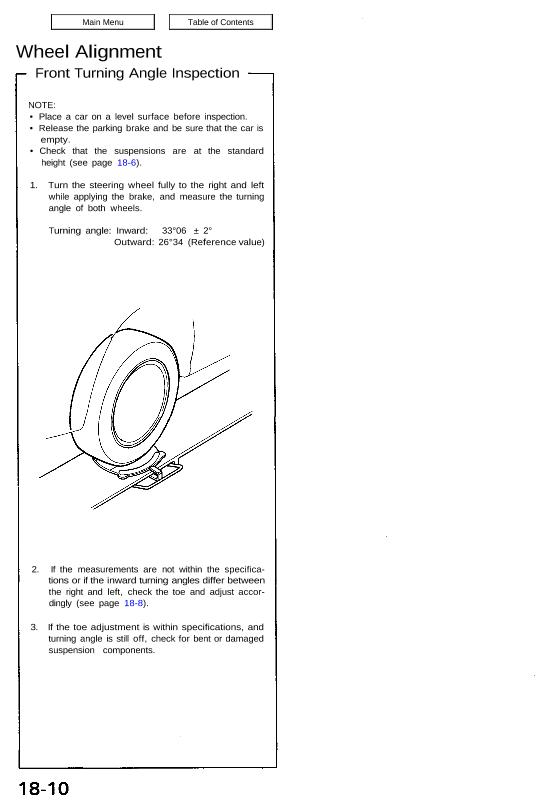
Wheel Alignment Front Turning Angle Inspection NOTE: • Place a car on a level surface before inspection. • Release the parking brake and be sure that the car is empty. • Check that the suspensions are at the standard height (see page 18-6). 1. Turn the steering wheel fully to the right and left while […]