Category: Body
Categories
nsxb20021a.pdf
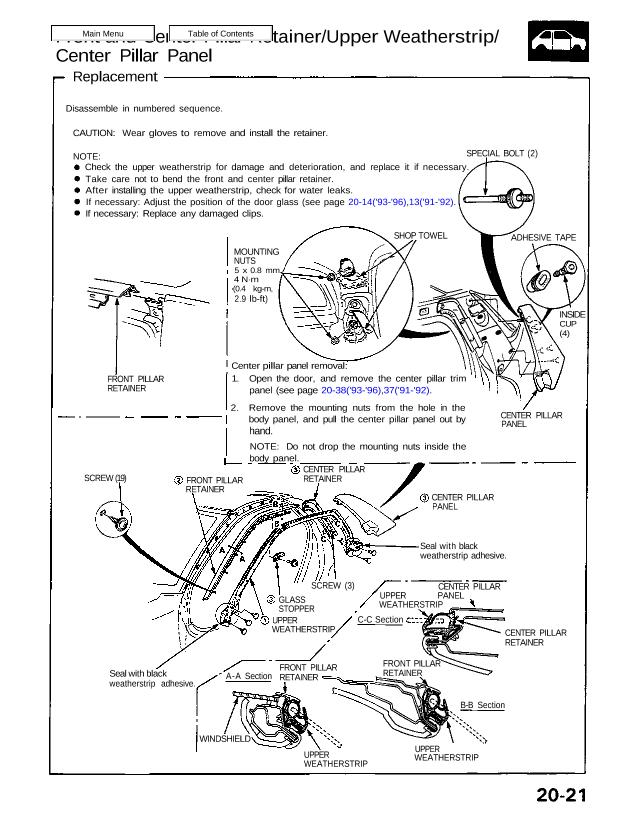
Front and Center Pillar Retainer/Upper Weatherstrip/ Center Pillar Panel Replacement Disassemble in numbered sequence. CAUTION: Wear gloves to remove and install the retainer. NOTE: Check the upper weatherstrip for damage and deterioration, and replace it if necessary. Take care not to bend the front and center pillar retainer. After installing the upper weatherstrip, check for […]
Categories
nsxb20040a.pdf
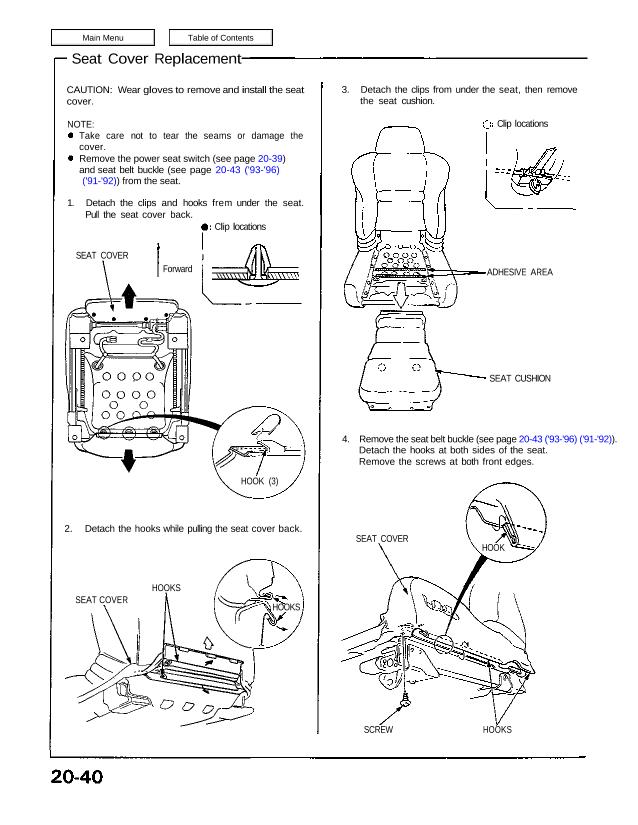
Seats Seat Cover Replacement CAUTION: Wear gloves to remove and install the seat cover. NOTE: Take care not to tear the seams or damage the cover. Remove the power seat switch (see page 20-39) and seat belt buckle (see page 20-43 (’93-’96) (’91-’92)) from the seat. 1. Detach the clips and hooks frem under the […]
Categories
nsxb20064a.pdf
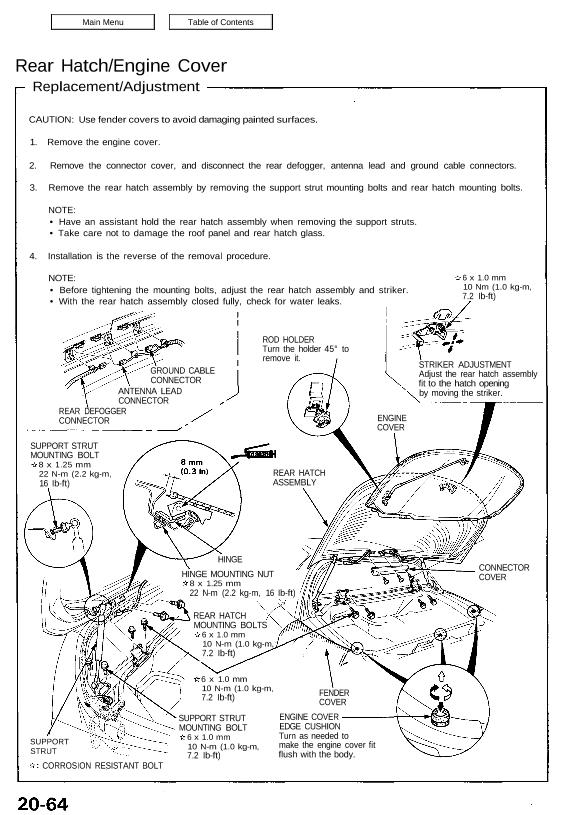
Rear Hatch/Engine Cover Replacement/Adjustment CAUTION: Use fender covers to avoid damaging painted surfaces. 1. Remove the engine cover. 2. Remove the connector cover, and disconnect the rear defogger, antenna lead and ground cable connectors. 3. Remove the rear hatch assembly by removing the support strut mounting bolts and rear hatch mounting bolts. NOTE: • Have […]
Categories
nsxb20062a.pdf
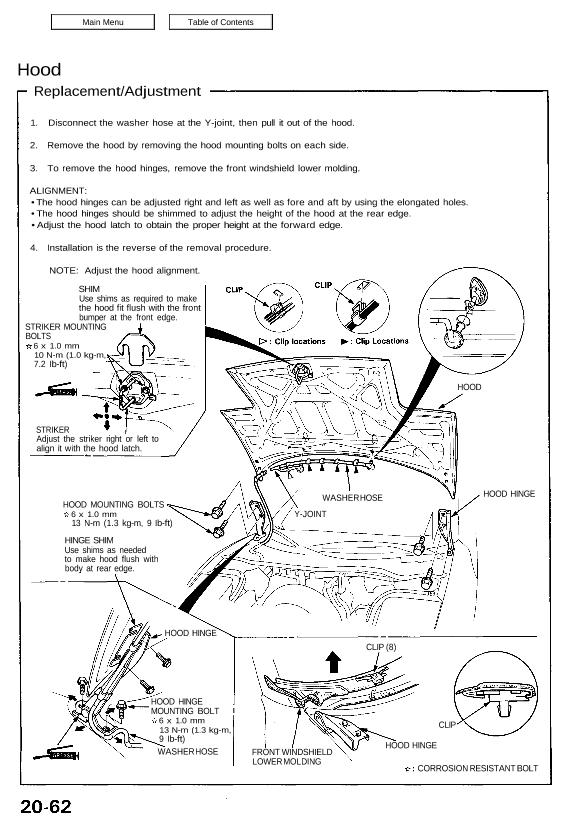
Hood Replacement/Adjustment 1. Disconnect the washer hose at the Y-joint, then pull it out of the hood. 2. Remove the hood by removing the hood mounting bolts on each side. 3. To remove the hood hinges, remove the front windshield lower molding. ALIGNMENT: • The hood hinges can be adjusted right and left as well […]
Categories
nsxb20046a.pdf
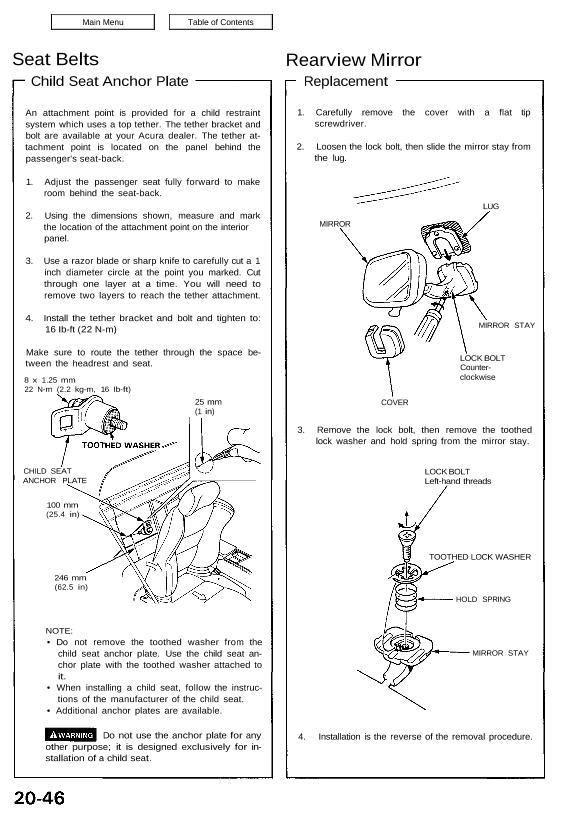
Seat Belts Child Seat Anchor Plate An attachment point is provided for a child restraint system which uses a top tether. The tether bracket and bolt are available at your Acura dealer. The tether at- tachment point is located on the panel behind the passenger’s seat-back. 1. Adjust the passenger seat fully forward to make […]
Categories
nsxb20029a.pdf
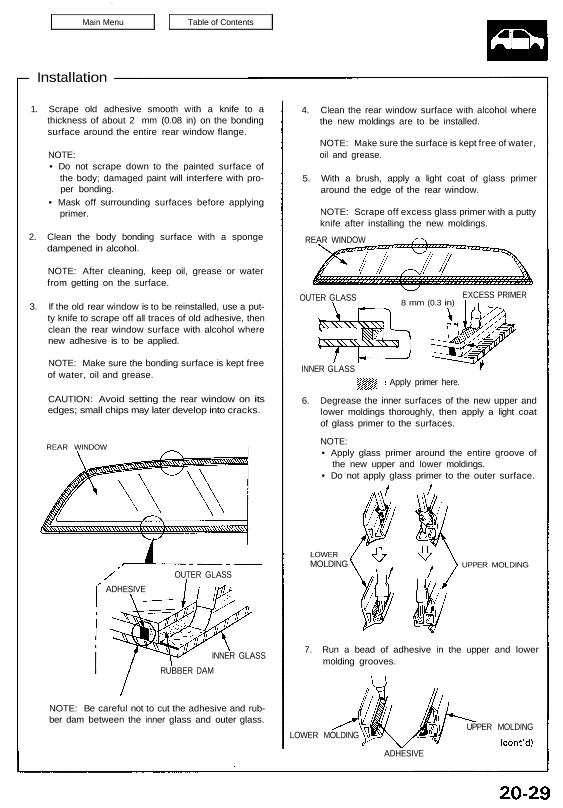
Installation 1. Scrape old adhesive smooth with a knife to a thickness of about 2 mm (0.08 in) on the bonding surface around the entire rear window flange. NOTE: • Do not scrape down to the painted surface of the body; damaged paint will interfere with pro- per bonding. • Mask off surrounding surfaces before […]
Categories
nsxb20072a.pdf
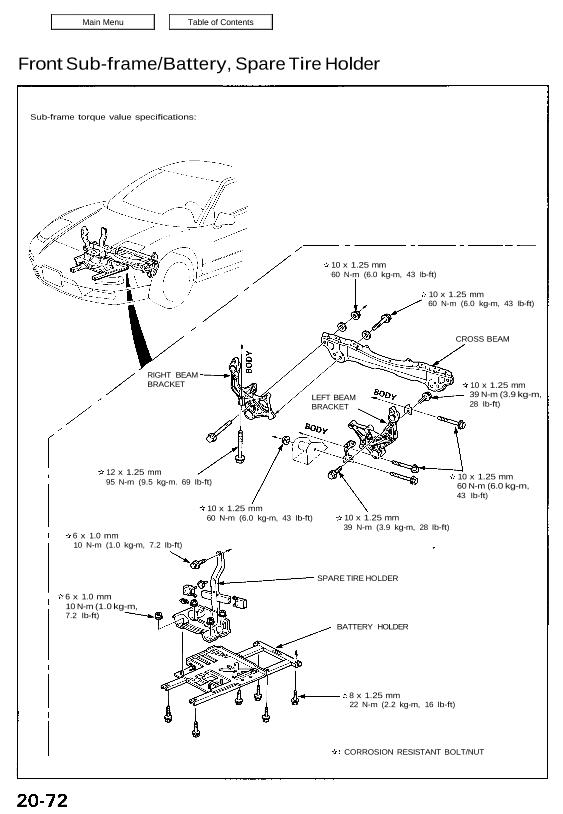
Front Sub-frame/Battery, Spare Tire Holder Sub-frame torque value specifications: 10 x 1.25 mm 60 N-m (6.0 kg-m, 43 Ib-ft) 10 x 1.25 mm 60 N-m (6.0 kg-m, 43 Ib-ft) CROSS BEAM 10 x 1.25 mm 39 N-m (3.9 kg-m, 28 Ib-ft) 12 x 1.25 mm 95 N-m (9.5 kg-m. 69 Ib-ft) 10 x 1.25 mm60 […]
Categories
nsxe20039a.pdf
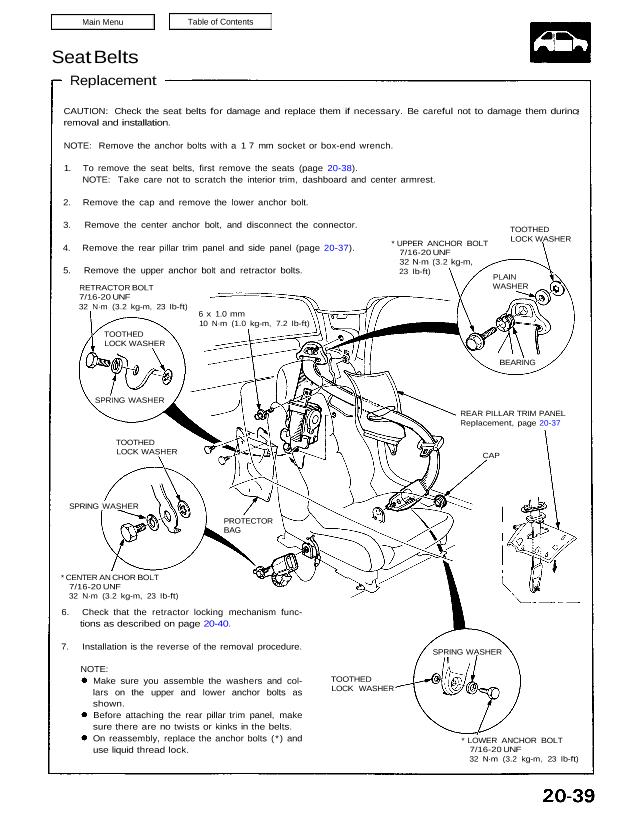
Seat Belts Replacement CAUTION: Check the seat belts for damage and replace them if necessary. Be careful not to damage them durinc removal and installation. NOTE: Remove the anchor bolts with a 1 7 mm socket or box-end wrench. 1. To remove the seat belts, first remove the seats (page 20-38). NOTE: Take care not […]
Categories
nsxb20007a.pdf
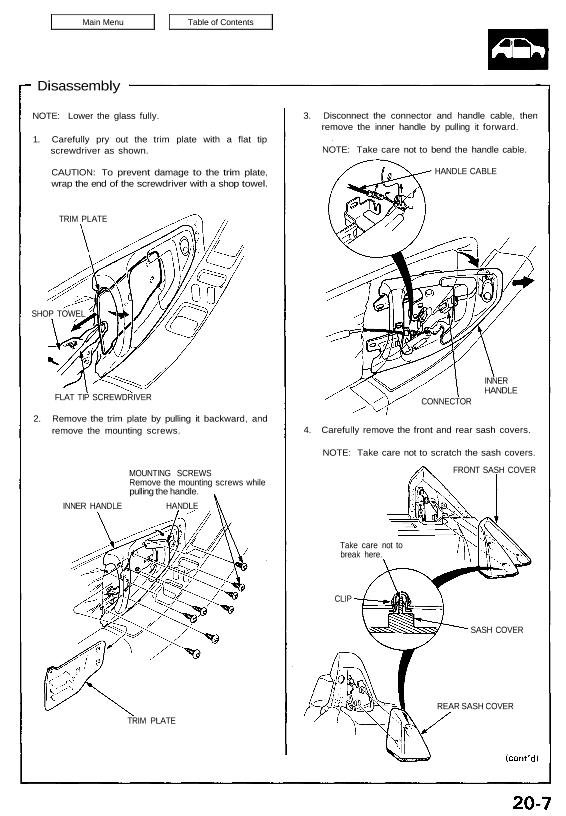
Disassembly NOTE: Lower the glass fully. 1. Carefully pry out the trim plate with a flat tip screwdriver as shown. CAUTION: To prevent damage to the trim plate, wrap the end of the screwdriver with a shop towel. TRIM PLATE SHOP TOWEL FLAT TIP SCREWDRIVER 2. Remove the trim plate by pulling it backward, and […]
Categories
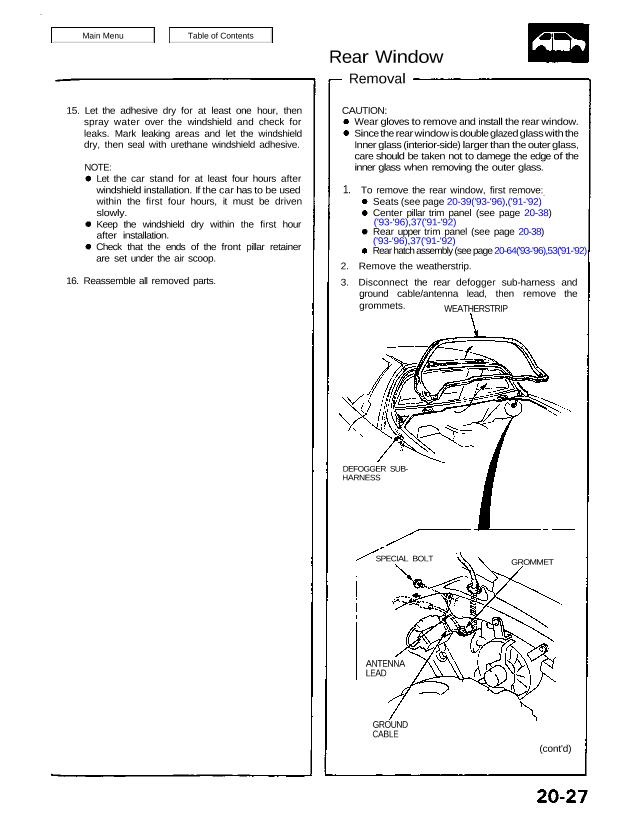
nsxb20027a.pdf
Rear Window Removal CAUTION: Wear gloves to remove and install the rear window. Since the rear window is double glazed glass with the Inner glass (interior-side) larger than the outer glass, care should be taken not to damege the edge of the inner glass when removing the outer glass. To remove the rear window, first […]