Category: Body
Categories
nsxb20106a.pdf
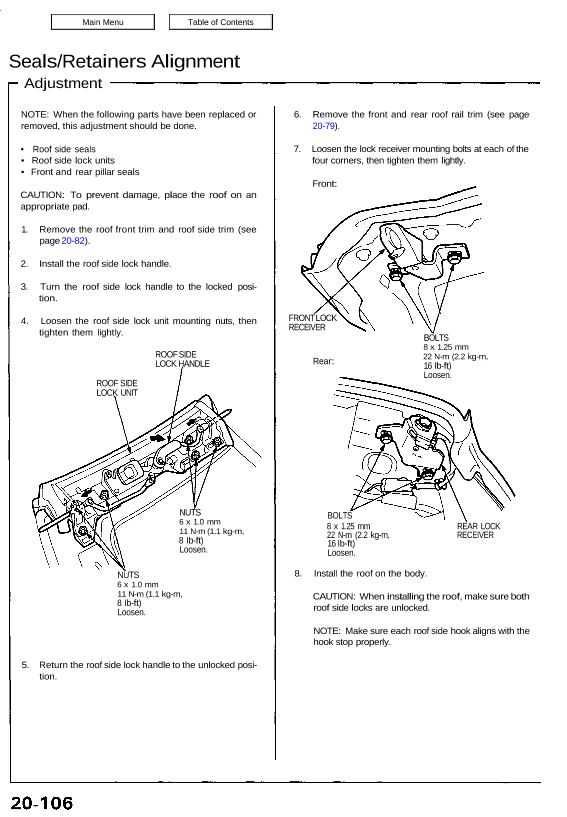
Seals/Retainers Alignment Adjustment NOTE: When the following parts have been replaced or removed, this adjustment should be done. • Roof side seals • Roof side lock units • Front and rear pillar seals CAUTION: To prevent damage, place the roof on an appropriate pad. 1. Remove the roof front trim and roof side trim (see […]
Categories
nsxd20055a.pdf
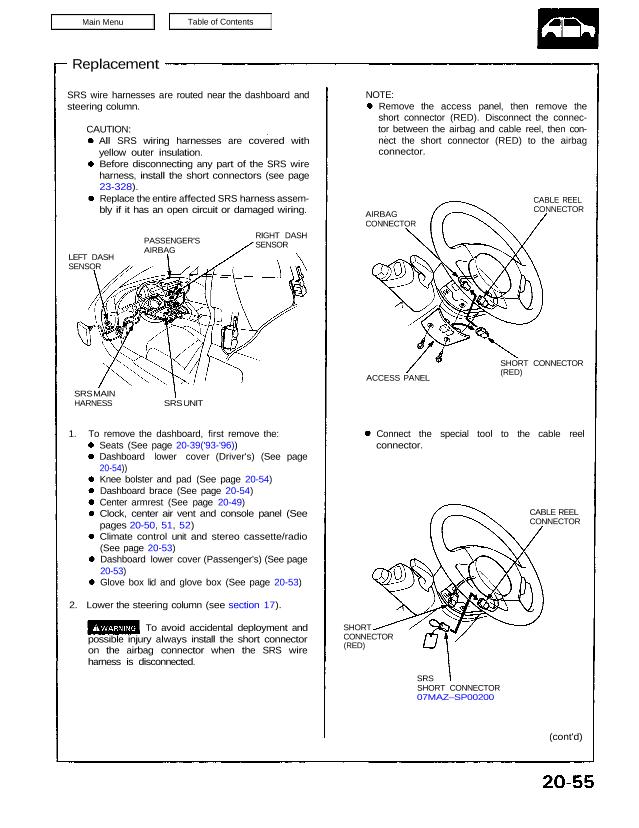
Replacement SRS wire harnesses are routed near the dashboard and steering column. CAUTION: All SRS wiring harnesses are covered with yellow outer insulation. Before disconnecting any part of the SRS wire harness, install the short connectors (see page 23-328). Replace the entire affected SRS harness assem- bly if it has an open circuit or damaged […]
Categories
nsxb20013a.pdf
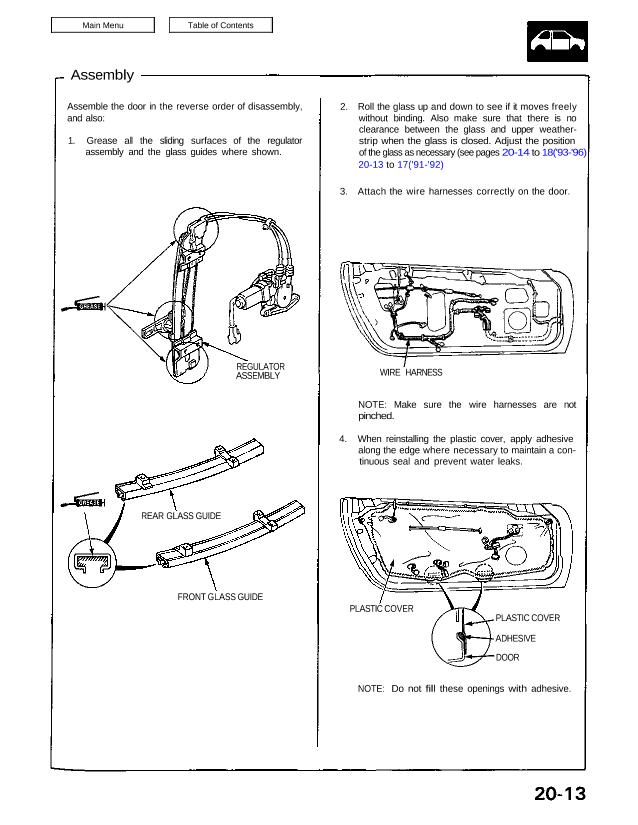
Assembly 2. Roll the glass up and down to see if it moves freely without binding. Also make sure that there is no clearance between the glass and upper weather- strip when the glass is closed. Adjust the position of the glass as necessary (see pages 20-14 to 18(’93-’96) 20-13 to 17(’91-’92) 3. Attach the […]
Categories
nsxb20023a.pdf
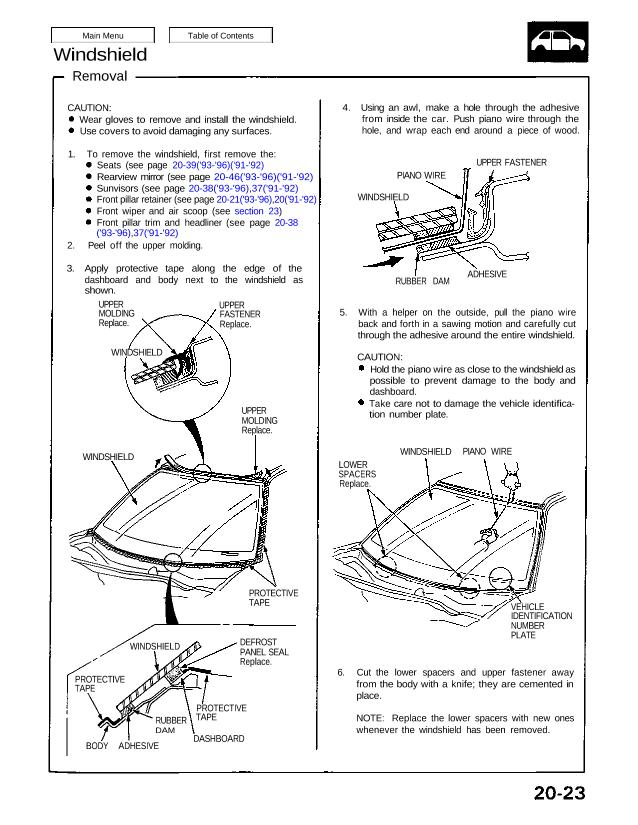
Windshield Removal CAUTION: Wear gloves to remove and install the windshield. Use covers to avoid damaging any surfaces. 1. To remove the windshield, first remove the: Seats (see page 20-39(’93-’96)(’91-’92) Rearview mirror (see page 20-46(’93-’96)(’91-’92) Sunvisors (see page 20-38(’93-’96),37(’91-’92) Front pillar retainer (see page 20-21(’93-’96),20(’91-’92) Front wiper and air scoop (see section 23) Front pillar […]
Categories
nsxe20043a.pdf

Dashboard/Center Armrest Component Removal/Installation SRS wire harnesses are routed near the dashboard. CAUTION: All SRS electrical wiring harnesses are covered with yellow outer insulation. Before disconnecting the SRS wire harness, install the short connector on the airbag (see page 23-323). Replace the entire effected SRS harness assembly if it has an open circuit or damaged […]
Categories
nsxb20067a.pdf
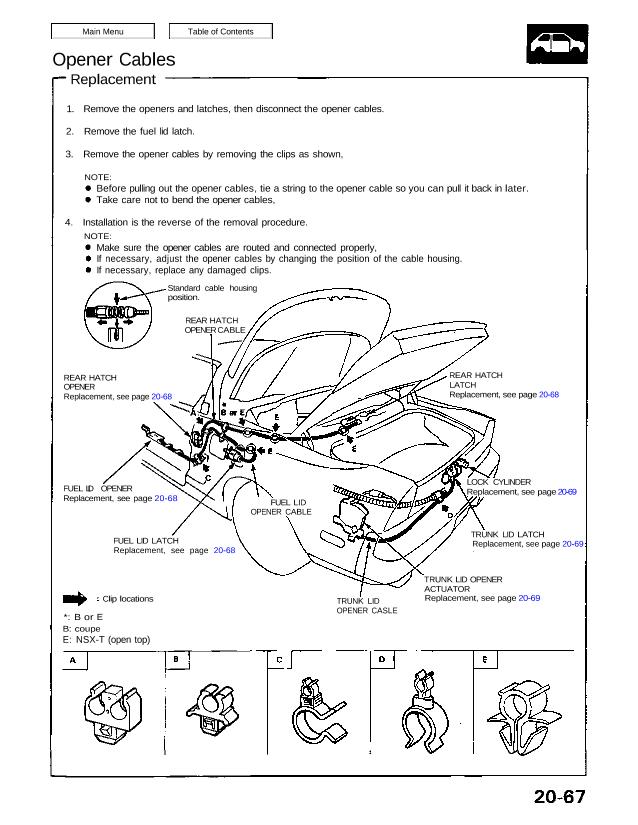
Opener Cables Replacement 1. Remove the openers and latches, then disconnect the opener cables. 2. Remove the fuel lid latch. 3. Remove the opener cables by removing the clips as shown, NOTE: Before pulling out the opener cables, tie a string to the opener cable so you can pull it back in later. Take care […]
Categories
nsxb20060a.pdf
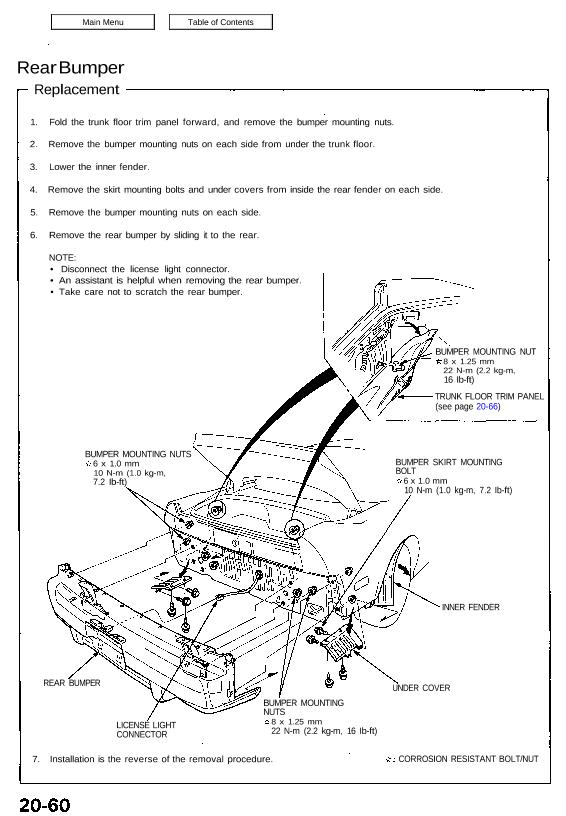
Rear Bumper Replacement 1. Fold the trunk floor trim panel forward, and remove the bumper mounting nuts. 2. Remove the bumper mounting nuts on each side from under the trunk floor. 3. Lower the inner fender. 4. Remove the skirt mounting bolts and under covers from inside the rear fender on each side. 5. Remove […]
Categories
nsxb20047a.pdf
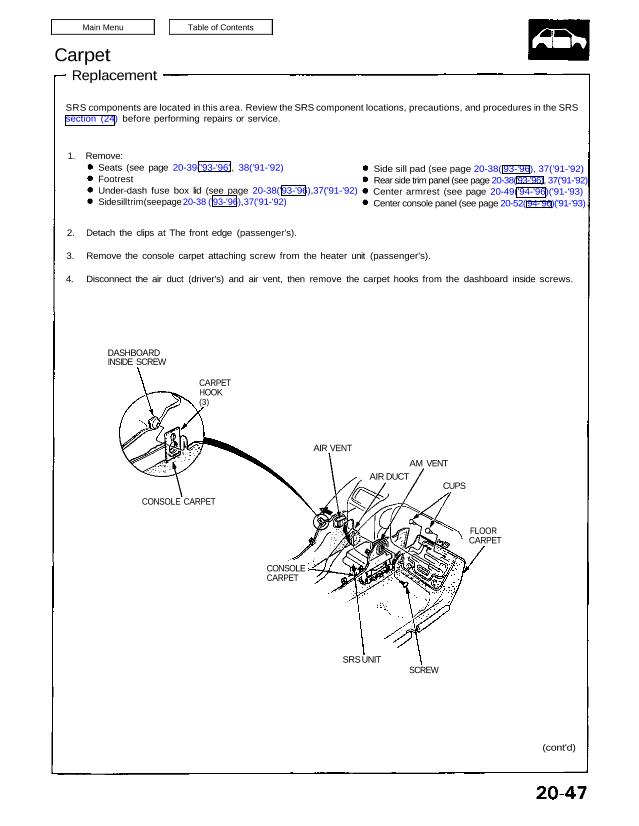
Carpet Replacement SRS components are located in this area. Review the SRS component locations, precautions, and procedures in the SRS section (24) before performing repairs or service. DASHBOARD INSIDE SCREW CARPET HOOK (3) AIR VENT AM VENT AIR DUCT CUPS FLOOR CARPET CONSOLE CARPET CONSOLE CARPET SRS UNIT SCREW (cont’d) 1. Remove: Seats (see page […]
Categories
nsxb20004a.pdf
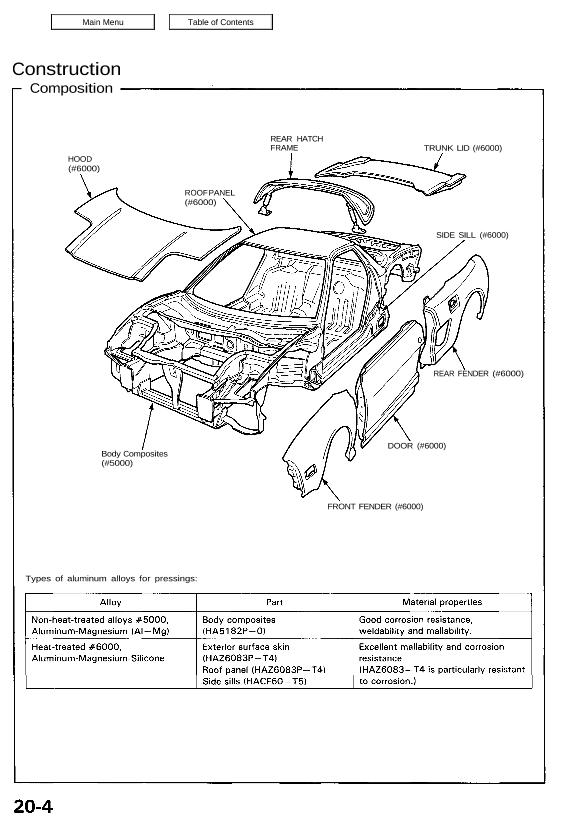
Construction Composition REAR HATCH FRAME TRUNK LID (#6000) HOOD (#6000) SIDE SILL (#6000) REAR FENDER (#6000) Body Composites (#5000) DOOR (#6000) FRONT FENDER (#6000) Types of aluminum alloys for pressings: ROOF PANEL (#6000) Attachments nsxb20004a (65 kB)