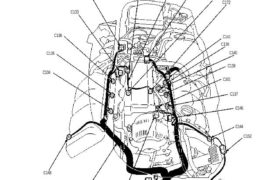
Radiator and Condenser Fan Controls Component Location Index UNDER HOOD RELAY BOX A RADIATOR FAN RESISTOR Test, page 23-116 RIGHT CONDENSER FAN MOTOR Test, page 23-117 Replacement, see section 22 RADIATOR FAN MOTOR Test, page 23-117 Replacement, see section 5 LEFT CONDENSER FAN MOTOR Test, page 23-117 Replacement, see section 22 A/C TRIPLE PRESSURE SWITCH […]
Categories
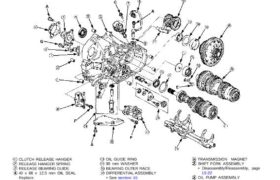
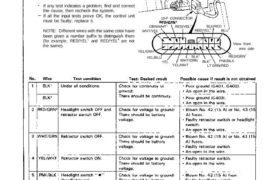
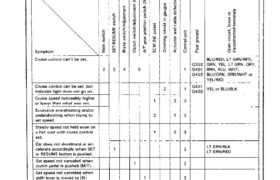
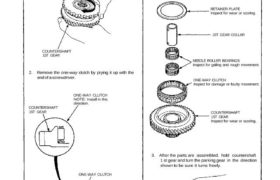
nsxd23110a.pdf