Category: Electrical
Categories
nsxb23219a.pdf
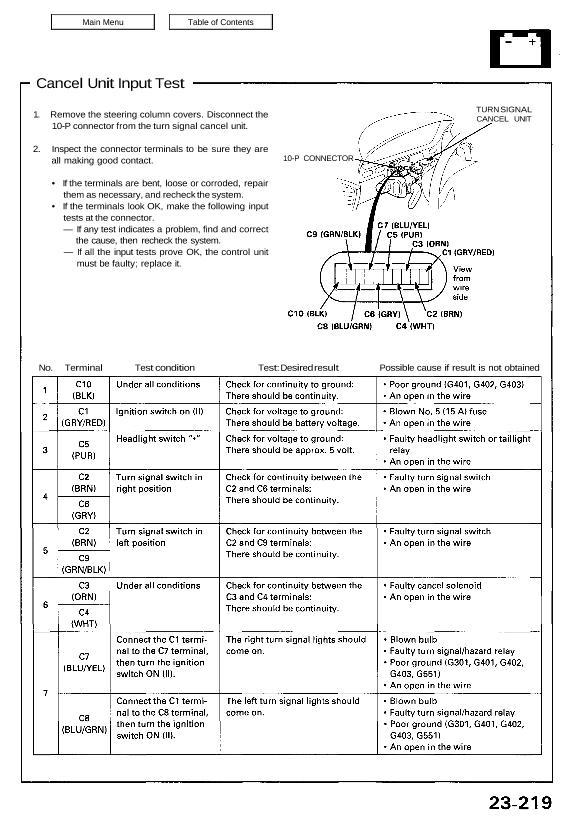
Cancel Unit Input Test 1. Remove the steering column covers. Disconnect the 10-P connector from the turn signal cancel unit. 2. Inspect the connector terminals to be sure they are all making good contact. • If the terminals are bent, loose or corroded, repair them as necessary, and recheck the system. • If the terminals […]
Categories
nsxb23269a.pdf
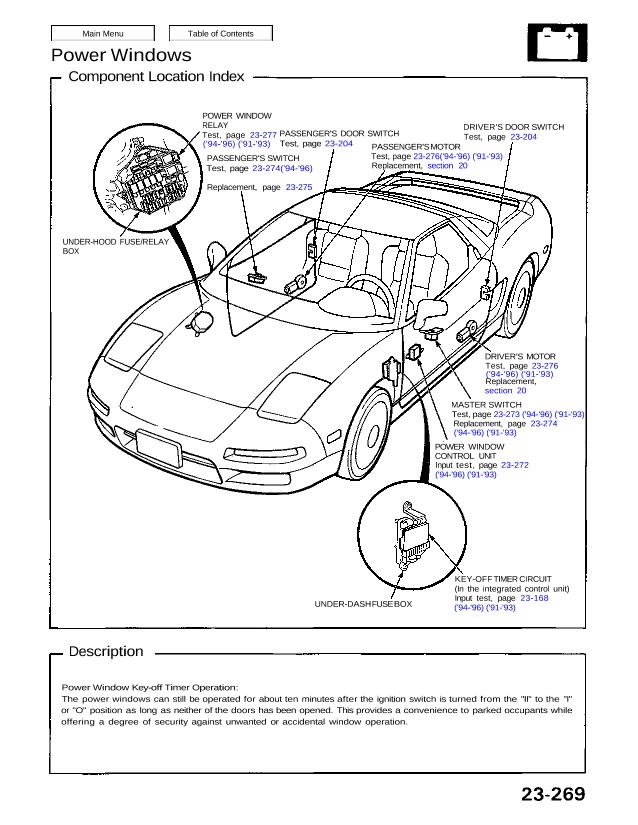
Power Windows Component Location Index POWER WINDOW RELAY Test, page 23-277 (’94-’96) (’91-’93) PASSENGER’S SWITCH Test, page 23-274(’94-’96) Replacement, page 23-275 PASSENGER’S DOOR SWITCH Test, page 23-204 PASSENGER’S MOTOR Test, page 23-276(’94-’96) (’91-’93) Replacement, section 20 DRIVER’S DOOR SWITCH Test, page 23-204 DRIVER’S MOTOR Test, page 23-276 (’94-’96) (’91-’93) Replacement, section 20 MASTER SWITCH Test, […]
Categories
nsxb23255a.pdf
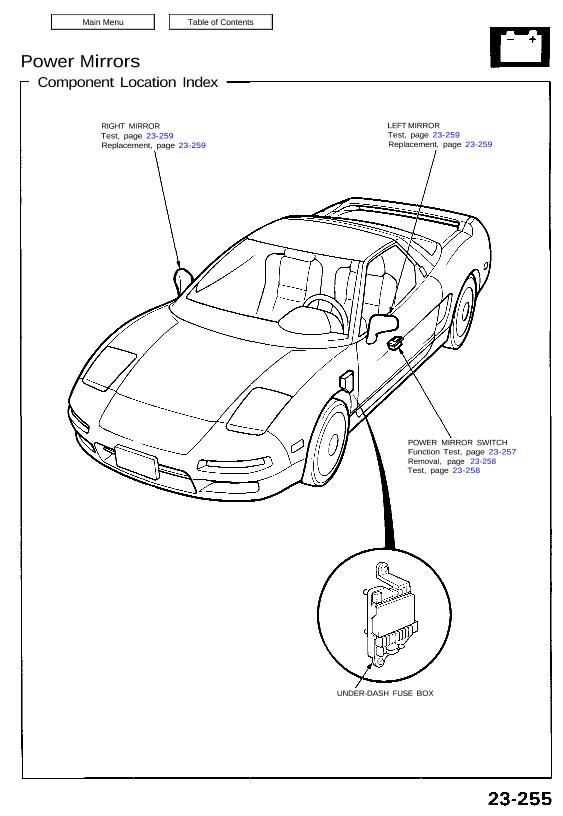
Power Mirrors Component Location Index RIGHT MIRROR Test, page 23-259 Replacement, page 23-259 LEFT MIRROR Test, page 23-259 Replacement, page 23-259 POWER MIRROR SWITCH Function Test, page 23-257 Removal, page 23-258 Test, page 23-258 UNDER-DASH FUSE BOX Attachments nsxb23255a (47 kB)
Categories
nsxd23073a.pdf
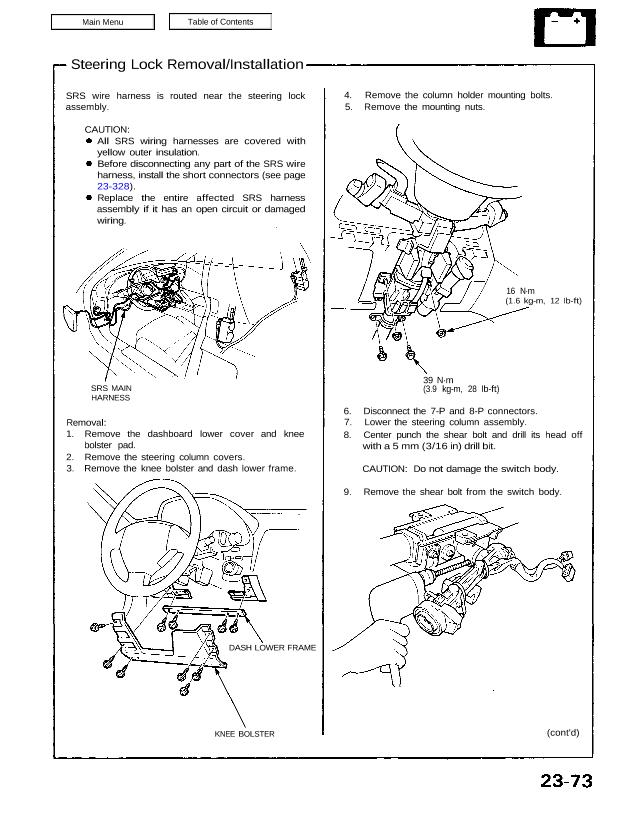
Steering Lock Removal/Installation SRS wire harness is routed near the steering lock assembly. CAUTION: All SRS wiring harnesses are covered with yellow outer insulation. Before disconnecting any part of the SRS wire harness, install the short connectors (see page 23-328). Replace the entire affected SRS harness assembly if it has an open circuit or damaged […]
Categories
nsxe23146a.pdf
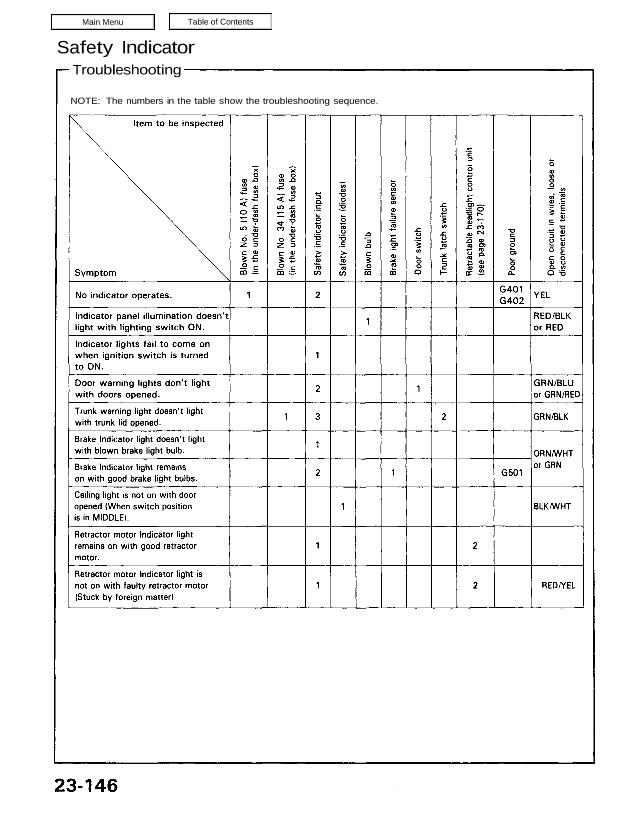
Safety Indicator Troubleshooting NOTE: The numbers in the table show the troubleshooting sequence. Main Menu Table of Contents Safety Indicator Troubleshooting NOTE: The numbers in the table show the troubleshooting sequence. Item to be inspected Blown No. 5 (10 A) fuse (in the under-dash fuse box] Blown No. 34 (15 A) fuse (in the under-dash […]
Categories
nsxd23311a.pdf
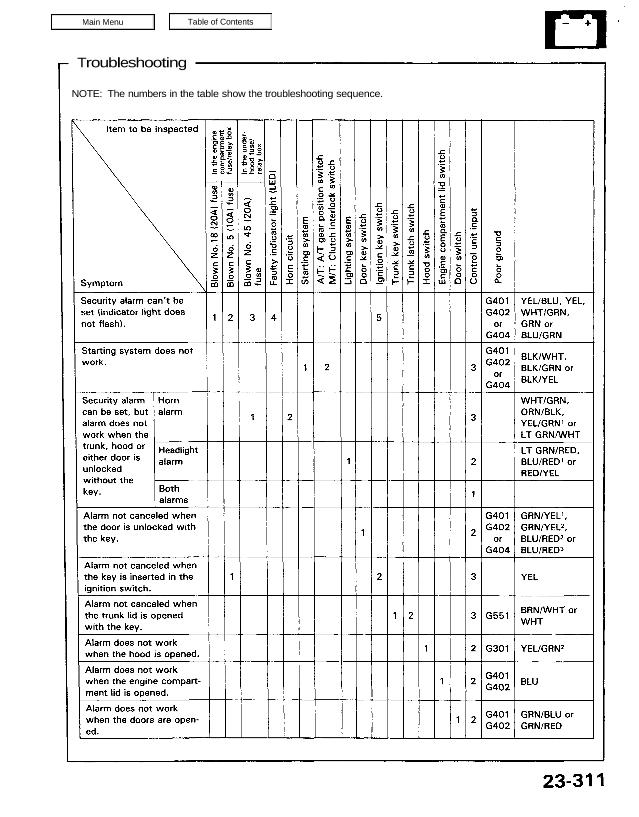
Troubleshooting NOTE: The numbers in the table show the troubleshooting sequence. Main Menu Table of Contents Troubleshooting NOTE: The numbers in the table show the troubleshooting sequence. Item to be Inspected „Eg L Een-9 ≞∖ me). nux ggg ≣≝≣ .c en: Ф .i: o ⋅≔⋮⊙ :gg 0.:: ↼∙ ∙∙ „‚ .. _ ↩ ⋅− :o: […]
Categories
nsxb23286a.pdf
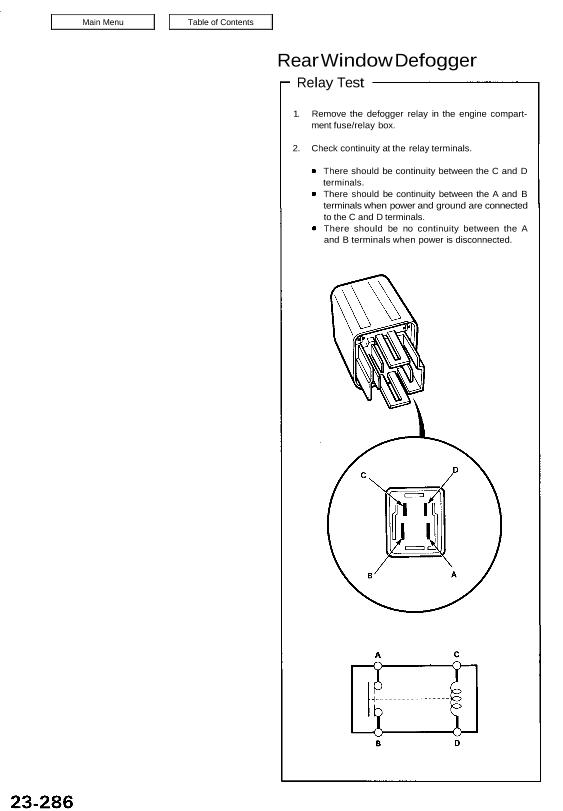
Rear Window Defogger Relay Test 1. Remove the defogger relay in the engine compart- ment fuse/relay box. 2. Check continuity at the relay terminals. There should be continuity between the C and D terminals. There should be continuity between the A and B terminals when power and ground are connected to the C and D […]
Categories
nsxb23287a.pdf
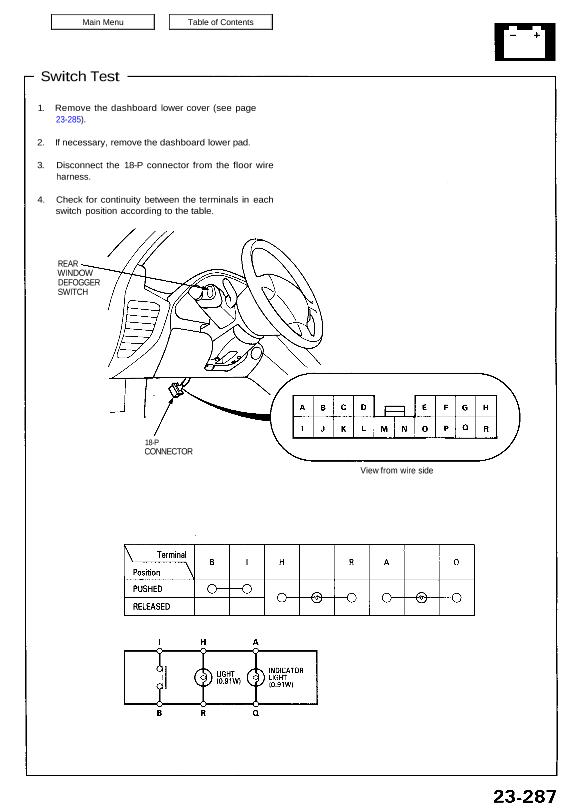
Switch Test 1. Remove the dashboard lower cover (see page 23-285). 2. If necessary, remove the dashboard lower pad. 3. Disconnect the 18-P connector from the floor wire harness. 4. Check for continuity between the terminals in each switch position according to the table. REAR WINDOW DEFOGGER SWITCH 18-P CONNECTOR View from wire side Attachments […]
Categories
nsxb23323a.pdf
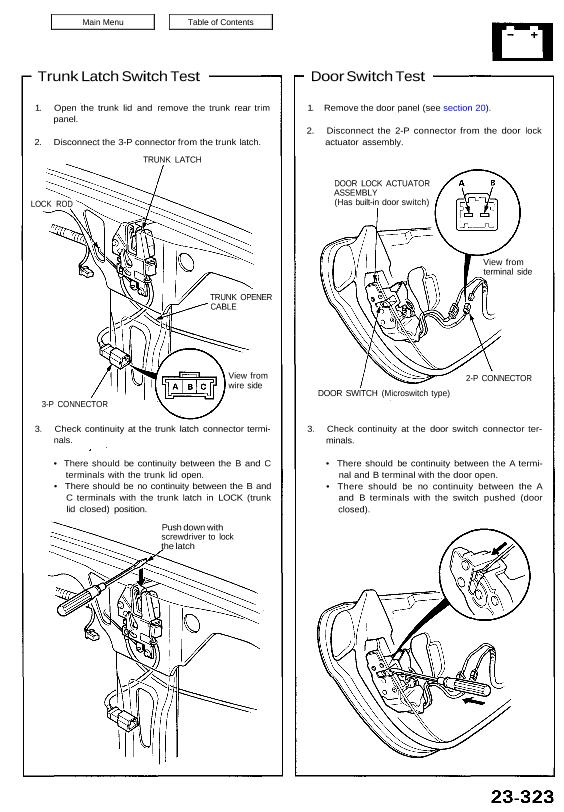
Trunk Latch Switch Test 1. Open the trunk lid and remove the trunk rear trim panel. 2. Disconnect the 3-P connector from the trunk latch. TRUNK LATCH LOCK ROD TRUNK OPENER CABLE View from wire side 3-P CONNECTOR 3. Check continuity at the trunk latch connector termi- nals. • There should be continuity between the […]
Categories
nsxb23271a.pdf
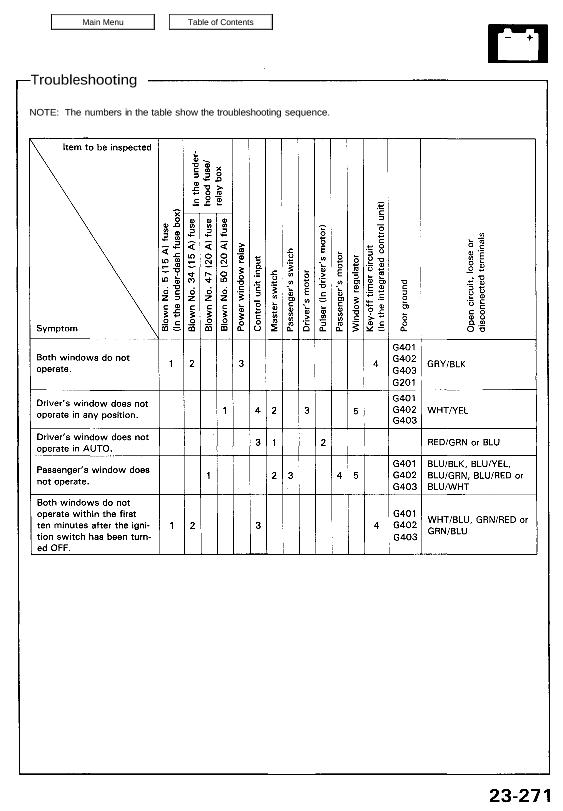
NOTE: The numbers in the table show the troubleshooting sequence. Troubleshooting Main Menu Table of Contents Troubleshooting NOTE: The numbers in the table show the troubleshooting sequence. Item to be inspected In the under- hood fuse/ relay box Blown No. 5 (15 A) fuse (In the under-dash fuse box) Blown No. 34 (15 A) fuse […]