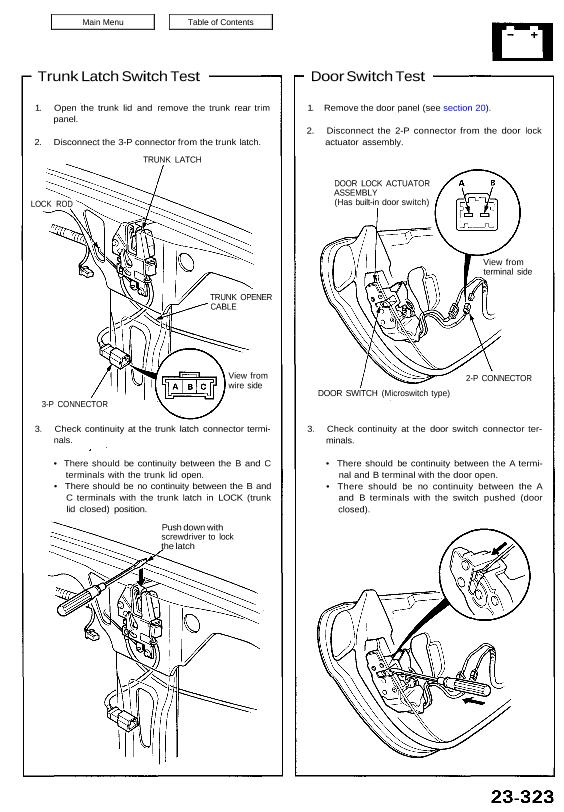
Trunk Latch Switch Test
1. Open the trunk lid and remove the trunk rear trim
panel.
2. Disconnect the 3-P connector from the trunk latch.
TRUNK LATCH
LOCK ROD
TRUNK OPENER
CABLE
View from
wire side
3-P CONNECTOR
3. Check continuity at the trunk latch connector termi-
nals.
• There should be continuity between the B and C
terminals with the trunk lid open.
• There should be no continuity between the B and
C terminals with the trunk latch in LOCK (trunk
lid closed) position.
Push down with
screwdriver to lock
the latch
Door Switch Test
1. Remove the door panel (see section 20).
2. Disconnect the 2-P connector from the door lock
actuator assembly.
DOOR LOCK ACTUATOR
ASSEMBLY
(Has built-in door switch)
View from
terminal side
2-P CONNECTOR
DOOR SWITCH (Microswitch type)
3. Check continuity at the door switch connector ter-
minals.
• There should be continuity between the A termi-
nal and B terminal with the door open.
• There should be no continuity between the A
and B terminals with the switch pushed (door
closed).