EPS Control unit
Replacement
CAUTION: Be careful not to damage the SRS wire
harnesses when servicing the control unit.
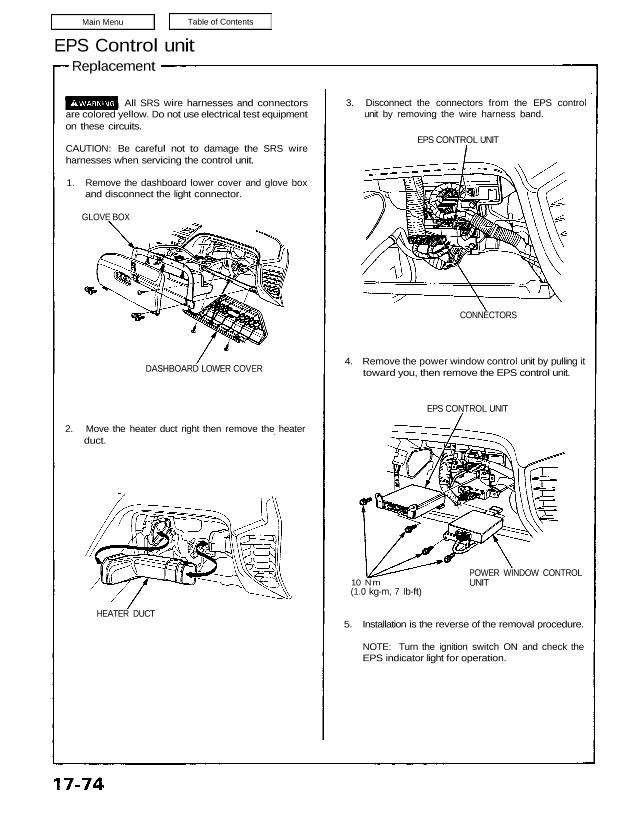
1. Remove the dashboard lower cover and glove box
and disconnect the light connector.
3. Disconnect the connectors from the EPS control
unit by removing the wire harness band.
EPS CONTROL UNIT
4. Remove the power window control unit by pulling it
toward you, then remove the EPS control unit.
5. Installation is the reverse of the removal procedure.
NOTE: Turn the ignition switch ON and check the
EPS indicator light for operation.
HEATER DUCT
2. Move the heater duct right then remove the heater
duct.
DASHBOARD LOWER COVER
GLOVE BOX
EPS CONTROL UNIT
POWER WINDOW CONTROL
UNIT10 N·m
(1.0 kg-m, 7 Ib-ft)
All SRS wire harnesses and connectors
are colored yellow. Do not use electrical test equipment
on these circuits.
CONNECTORS
