Reverse Shift Arm, Reverse Shift Fork
Clearance Inspection
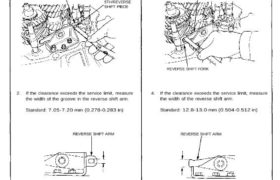
1. Measure the clearance between the reverse shift
arm and the 5th/reverse shift piece.
Standard: 0.05-0.30 mm
(0.002-0.012 in)
Service Limit: 0.5 mm (0.020 in)
REVERSE SHIFT ARM
5TH/REVERSE
SHIFT PIECE
2. If the clearance exceeds the service limit, measure
the width of the groove in the reverse shift arm.
Standard: 7.05-7.20 mm (0.278-0.283 in)
REVERSE SHIFT ARM
If the width of the groove exceeds the standard,
replace the reverse shift arm with a new one.
If the width of the groove is within the standard,
replace the 5th/reverse shift piece with a new one.
3. Measure the clearance between the reverse shift
arm and reverse shift fork.
Standard: 0.05-0.35 mm
(0.002-0.014 in)
Service Limit: 0.5 mm (0.020 in)
REVERSE SHIFT ARM
REVERSE SHIFT FORK
4. If the clearance exceeds the service limit, measure
the width of the reverse shift arm.
Standard: 12.8-13.0 mm (0.504-0.512 in)
REVERSE SHIFT ARM
If the width is less than the standard, replace the
reverse shift arm with a new one.
If the width is within the standard, replace the
reverse shift fork with a new one.
Reverse Shift Arm,
Reverse Shift Fork
Clearance Inspection
5. Measure the clearance between the reverse shift
fork and reverse synchro sleeve.
Standard: 0.45—0.65 mm
(0.018-0.026 in)
Service Limit: 1.0 mm (0.039 in)
REVERSE SYNCHRO SLEEVE REVERSE SHIFT FORK
6. If the clearance exceeds the service limit, measure
the thickness of the shift fork fingers.
Standard: 6.4-6.5 mm (0.252-0.256 in)
SHIFT FORK
If the thickness is less than the standard, replace
the reverse shift fork with a new one.
If the thickness is within the standard, replace the
reverse synchro sleeve with a new one.
NOTE: The synchro sleeve and synchro hub
should be replaced as a set.
