Trunk Opener
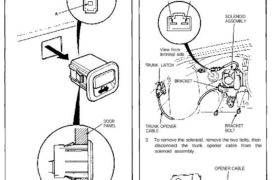
Opener Switch Test
1. Remove the driver’s door panel, then push the switch
out of the door panel as shown.
2. Check for continuity between the terminals.
• There should be continuity between the A and B
terminals when the switch is pushed.
• There should be no continuity when the switch
is released.
Solenoid Test/Replacement
1. Open the trunk lid, and remove the trunk side trim
panel.
2. Disconnect the 2-P connector from the solenoid
assembly, and test solenoid operation by connec-
ting battery power and ground to the A and B ter-
minals momentarily.
SOLENOID
ASSEMBLY
TRUNK LATCH
TRUNK OPENER
CABLE
BRACKET
BOLT
3. To remove the solenoid, remove the two bolts, then
disconnect the trunk opener cable from the
solenoid assembly.
OPENER CABLE
SOLENOID
ASSEMBLY
4. Install in the reverse order of removal.
BRACKET
View from
terminal side
DOOR
PANEL
