Rocker Arms and Shafts
Clearance
Measure both the intake rocker shafts and exhaust rocker
shafts.
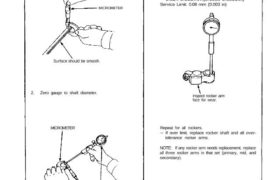
1. Measure diameter of shaft at first rocker location.
MICROMETER
Surface should be smooth.
2. Zero gauge to shaft diameter.
MICROMETER
CYLINDER BORE
GAUGE
Inspect rocker arm
face for wear.
Repeat for all rockers.
3. Measure inside diameter of rocker arm and check for
out-of-round condition.
Rocker Arm-to-Shaft Clearance (IN and EX):
Standard (New):
Primary and Secondary:
0.025-0.052 mm (0.0010-0.0020 in)
Mid:
0.024-0.053 mm (0.0009-0.0021 in)
Service Limit: 0.08 mm (0.003 in)
If over limit, replace rocker shaft and all over-
tolerance rocker arms.
NOTE: If any rocker arm needs replacement, replace
all three rocker arms in that set (primary, mid, and
secondary).
