Category: Electrical
Categories
nsxb23193a.pdf
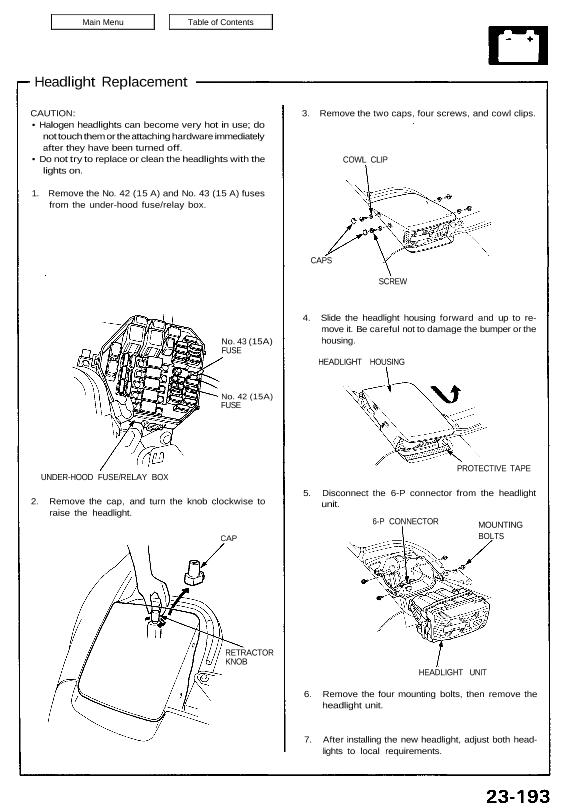
Headlight Replacement CAUTION: • Halogen headlights can become very hot in use; do not touch them or the attaching hardware immediately after they have been turned off. • Do not try to replace or clean the headlights with the lights on. 1. Remove the No. 42 (15 A) and No. 43 (15 A) fuses from […]
Categories
nsxd23302a.pdf
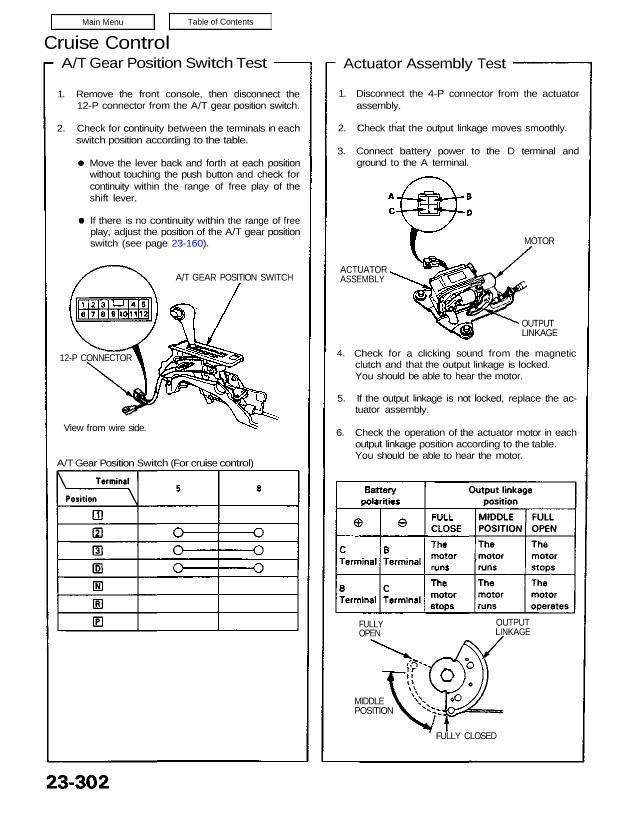
Cruise Control A/T Gear Position Switch Test 1. Remove the front console, then disconnect the 12-P connector from the A/T gear position switch. 2. Check for continuity between the terminals in each switch position according to the table. Move the lever back and forth at each position without touching the push button and check for […]
Categories
nsxb23258a.pdf
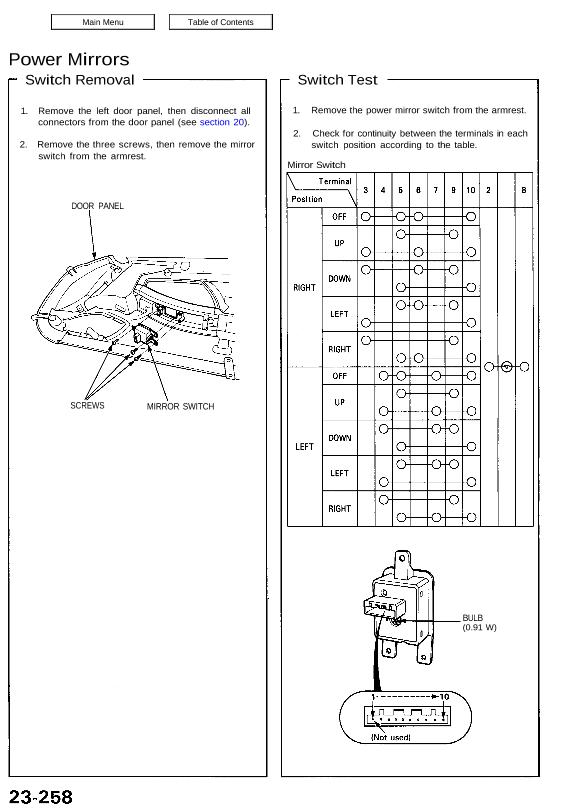
Power Mirrors Switch Removal 1. Remove the left door panel, then disconnect all connectors from the door panel (see section 20). 2. Remove the three screws, then remove the mirror switch from the armrest. DOOR PANEL SCREWS MIRROR SWITCH Switch Test 1. Remove the power mirror switch from the armrest. 2. Check for continuity between […]
Categories
nsxb23105a.pdf
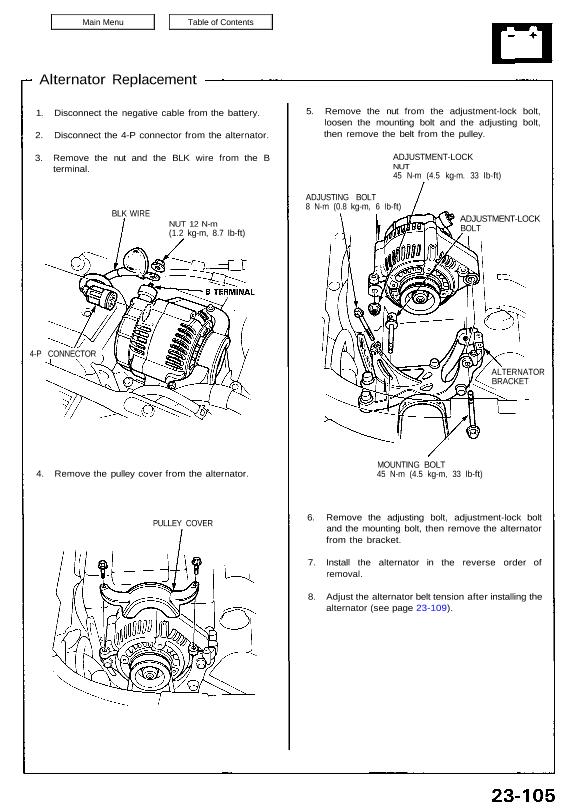
Alternator Replacement 1. Disconnect the negative cable from the battery. 2. Disconnect the 4-P connector from the alternator. 3. Remove the nut and the BLK wire from the B terminal. BLK WIRE NUT 12 N-m (1.2 kg-m, 8.7 Ib-ft) 4-P CONNECTOR 4. Remove the pulley cover from the alternator. PULLEY COVER 5. Remove the nut […]
Categories
nsxb23180a.pdf
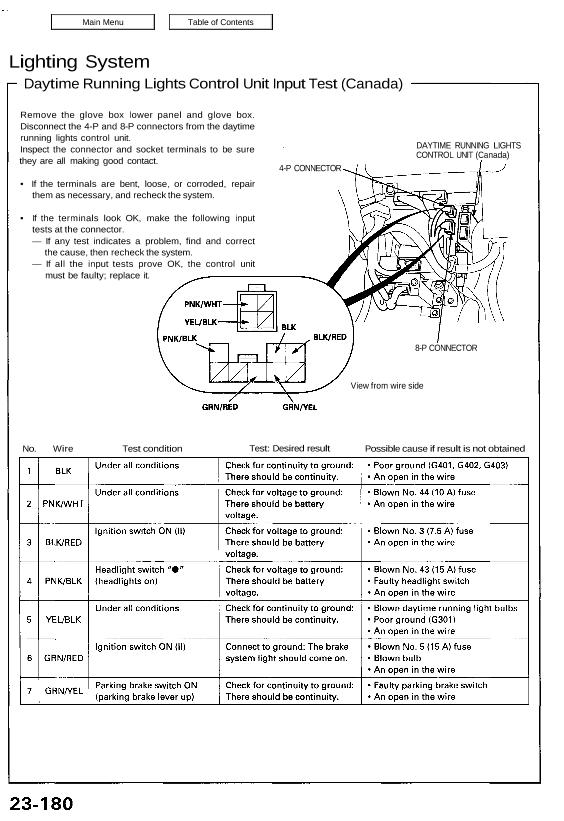
Lighting System Daytime Running Lights Control Unit Input Test (Canada) Remove the glove box lower panel and glove box. Disconnect the 4-P and 8-P connectors from the daytime running lights control unit. Inspect the connector and socket terminals to be sure they are all making good contact. • If the terminals are bent, loose, or […]
Categories
nsxe23291a.pdf
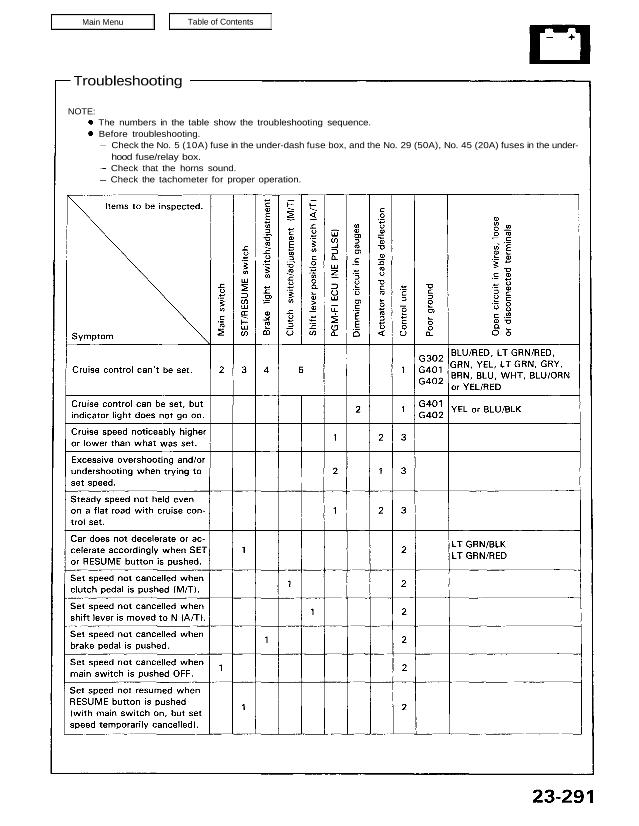
Troubleshooting NOTE: The numbers in the table show the troubleshooting sequence. Before troubleshooting. Check the No. 5 (10A) fuse in the under-dash fuse box, and the No. 29 (50A), No. 45 (20A) fuses in the under- hood fuse/relay box. Check that the horns sound. Check the tachometer for proper operation. Attachments nsxe23291a (166 kB)
Categories
nsxb23248a.pdf
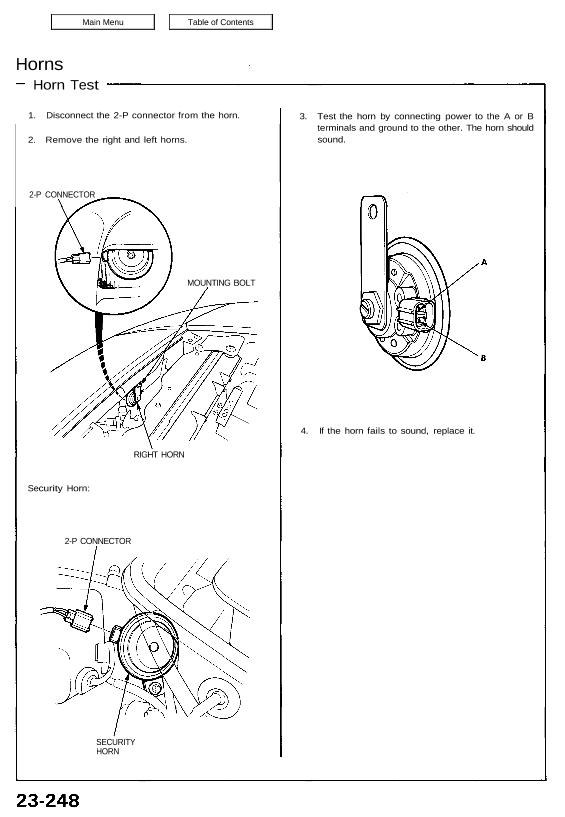
Horns Horn Test 1. Disconnect the 2-P connector from the horn. 2. Remove the right and left horns. 2-P CONNECTOR RIGHT HORN Security Horn: 2-P CONNECTOR SECURITY HORN 3. Test the horn by connecting power to the A or B terminals and ground to the other. The horn should sound. 4. If the horn fails […]
Categories
nsxb23086a.pdf
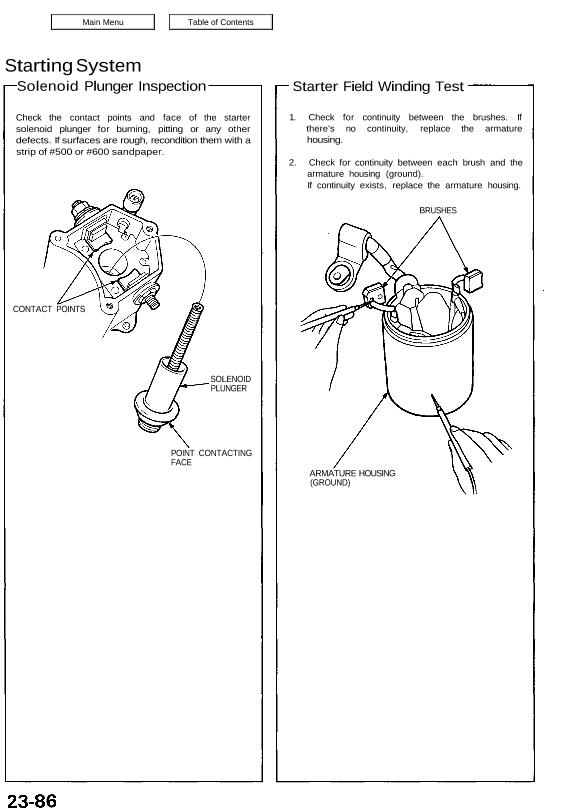
Starting System Solenoid Plunger Inspection Check the contact points and face of the starter solenoid plunger for burning, pitting or any other defects. If surfaces are rough, recondition them with a strip of #500 or #600 sandpaper. CONTACT POINTS SOLENOID PLUNGER POINT CONTACTING FACE Starter Field Winding Test 1. Check for continuity between the brushes. […]
Categories
nsxb23171a.pdf
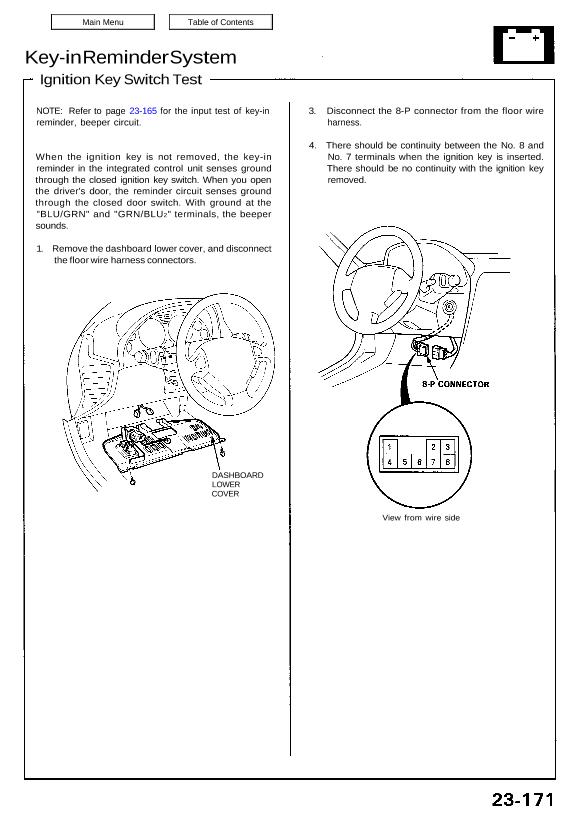
Key-in Reminder System Ignition Key Switch Test NOTE: Refer to page 23-165 for the input test of key-in reminder, beeper circuit. When the ignition key is not removed, the key-in reminder in the integrated control unit senses ground through the closed ignition key switch. When you open the driver’s door, the reminder circuit senses ground […]
Categories
nsxb23303a.pdf
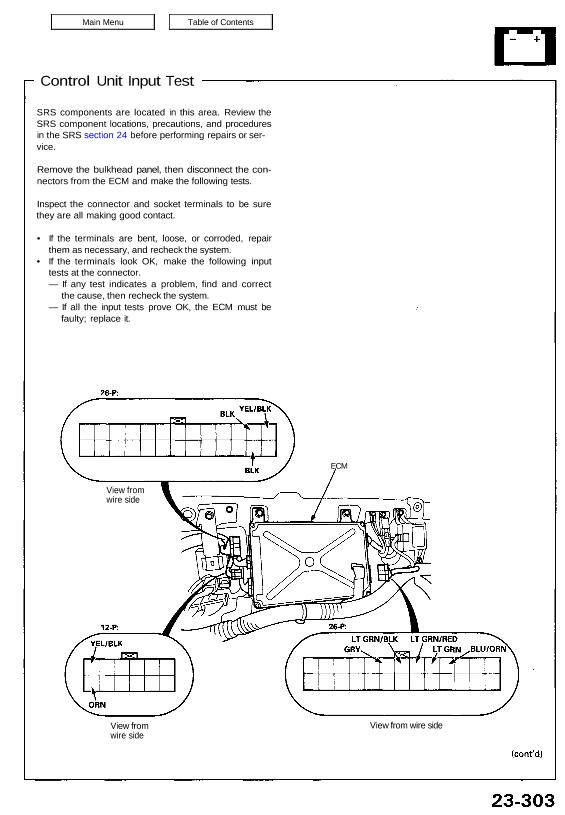
Control Unit Input Test SRS components are located in this area. Review the SRS component locations, precautions, and procedures in the SRS section 24 before performing repairs or ser- vice. Remove the bulkhead panel, then disconnect the con- nectors from the ECM and make the following tests. Inspect the connector and socket terminals to be […]