Headlight Replacement
CAUTION:
• Halogen headlights can become very hot in use; do
not touch them or the attaching hardware immediately
after they have been turned off.
• Do not try to replace or clean the headlights with the
lights on.
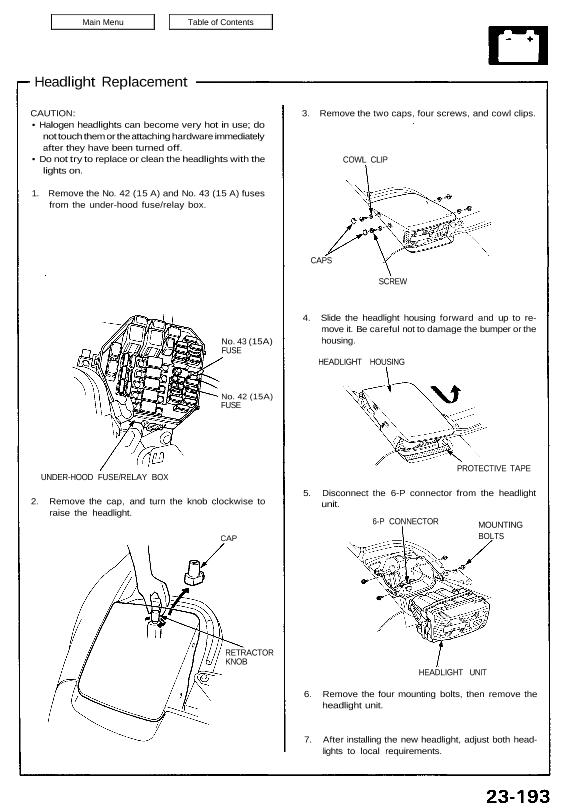
1. Remove the No. 42 (15 A) and No. 43 (15 A) fuses
from the under-hood fuse/relay box.
No. 43 (15A)
FUSE
No. 42 (15A)
FUSE
UNDER-HOOD FUSE/RELAY BOX
2. Remove the cap, and turn the knob clockwise to
raise the headlight.
CAP
RETRACTOR
KNOB
3. Remove the two caps, four screws, and cowl clips.
COWL CLIP
CAPS
SCREW
4. Slide the headlight housing forward and up to re-
move it. Be careful not to damage the bumper or the
housing.
HEADLIGHT HOUSING
PROTECTIVE TAPE
5. Disconnect the 6-P connector from the headlight
unit.
6-P CONNECTOR MOUNTING
BOLTS
HEADLIGHT UNIT
6. Remove the four mounting bolts, then remove the
headlight unit.
7. After installing the new headlight, adjust both head-
lights to local requirements.
