Driveshafts
Disassembly
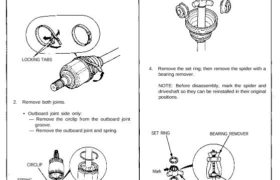
1. To remove the boot band, pry up the locking tabs
with screwdriver, and raise the end of the band.
NOTE: Carefully clamp the driveshaft in a vise
with soft jaws.
CAUTION: Take care not to damage the boots.
LOCKING TABS
2. Remove both joints.
• Outboard joint side only:
— Remove the circlip from the outboard joint
groove.
— Remove the outboard joint and spring.
CIRCLIP
SPRING
CAP
Outboard joint only.
3. Remove the rollers from the spider.
ROLLER
4. Remove the set ring; then remove the spider with a
bearing remover.
NOTE: Before disassembly, mark the spider and
driveshaft so they can be reinstalled in their original
positions.
SET RING BEARING REMOVER
Mark
Mark
SPIDER
DRIVESHAFT
SPIDER
SET RING
