Windshield Wiper Motor Test
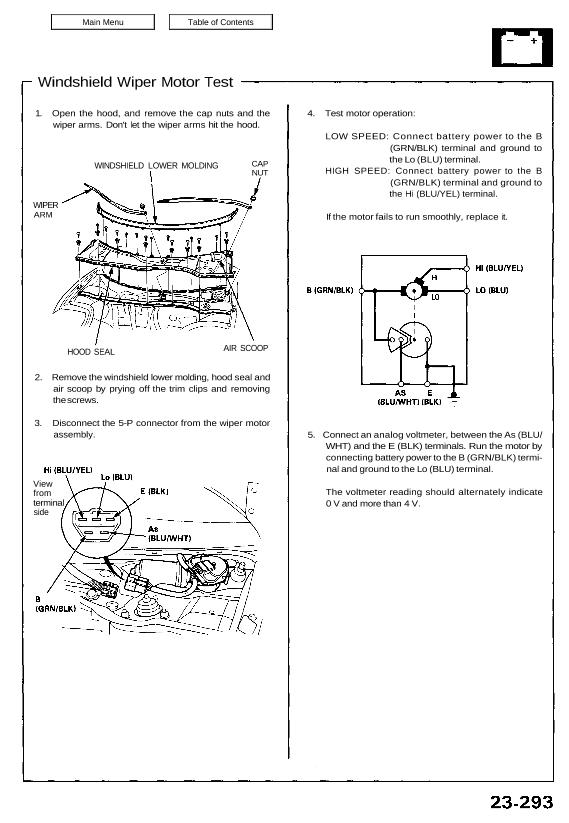
1. Open the hood, and remove the cap nuts and the
wiper arms. Don’t let the wiper arms hit the hood.
WIPER
ARM
WINDSHIELD LOWER MOLDING
HOOD SEAL AIR SCOOP
2. Remove the windshield lower molding, hood seal and
air scoop by prying off the trim clips and removing
the screws.
3. Disconnect the 5-P connector from the wiper motor
assembly.
View
from
terminal
side
4. Test motor operation:
LOW SPEED: Connect battery power to the B
(GRN/BLK) terminal and ground to
the Lo (BLU) terminal.
HIGH SPEED: Connect battery power to the B
(GRN/BLK) terminal and ground to
the Hi (BLU/YEL) terminal.
If the motor fails to run smoothly, replace it.
5. Connect an analog voltmeter, between the As (BLU/
WHT) and the E (BLK) terminals. Run the motor by
connecting battery power to the B (GRN/BLK) termi-
nal and ground to the Lo (BLU) terminal.
The voltmeter reading should alternately indicate
0 V and more than 4 V.
CAP
NUT
