Crankshaft
Inspection
• Clean the crankshaft oil passages with pipe
cleaners or a suitable brush.
• Check the keyway and threads.
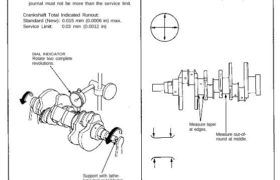
Alignment
• Measure runout on all main journals to make
sure the crank is not bent.
• The difference between measurements on each
journal must not be more than the service limit.
Crankshaft Total Indicated Runout:
Standard (New): 0.015 mm (0.0006 in) max.
Service Limit: 0.03 mm (0.0012 in)
DIAL INDICATOR
Rotate two complete
revolutions.
Support with lathe-
type tool or V-blocks.
Out-of-Round and Taper
• Measure out-of-round at the middle of each rod
and main journal in two places.
• The difference between measurements on each
journal must not be more than the service limit.
Journal Out-of-Round:
Standard (New): 0.004 mm (0.0002 in) max.
Service Limit: 0.006 mm (0.0002 in)
Measure taper
at edges.
Measure out-of-
round at middle.
• Measure taper at edges of each rod and main
journal.
• The difference between measurements on each
journal must not be more than the service limit.
Journal Taper:
Standard (New): 0.005 mm (0.0002 in) max.
Service Limit: 0.010 mm (0.0004 in)
