Rear Damper
Installation (cont’d)
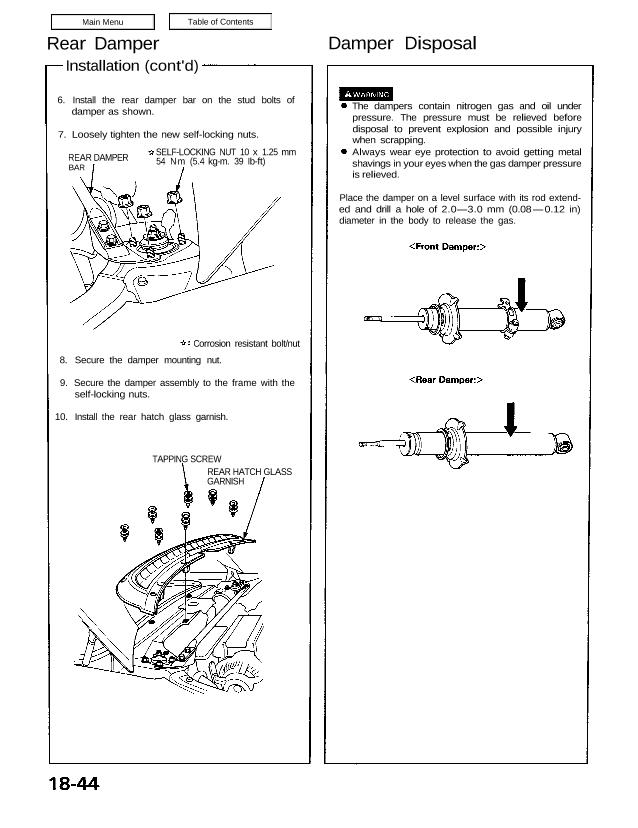
6. Install the rear damper bar on the stud bolts of
damper as shown.
7. Loosely tighten the new self-locking nuts.
REAR DAMPER
BAR
SELF-LOCKING NUT 10 x 1.25 mm
54 N.m (5.4 kg-m. 39 Ib-ft)
Corrosion resistant bolt/nut
8. Secure the damper mounting nut.
9. Secure the damper assembly to the frame with the
self-locking nuts.
10. Install the rear hatch glass garnish.
TAPPING SCREW
REAR HATCH GLASS
GARNISH
Damper Disposal
The dampers contain nitrogen gas and oil under
pressure. The pressure must be relieved before
disposal to prevent explosion and possible injury
when scrapping.
Always wear eye protection to avoid getting metal
shavings in your eyes when the gas damper pressure
is relieved.
Place the damper on a level surface with its rod extend-
ed and drill a hole of 2.0—3.0 mm (0.08 — 0.12 in)
diameter in the body to release the gas.
