Rear Hatch Glass
Removal
CAUTION:
• Use covers to avoid damaging the body.
• Wear gloves to remove and install the glass.
• Do not damage the defroster grid lines.
• Take care not scratch or score the molding.
1. Remove the rear hatch assembly from the body
(see page 20-64).
2. Using an awl, make a hole through the adhesive
and outer/inner rubber dams from the inside, at the
top of the glass. Push piano wire through the hole,
and wrap each end around a piece of wood.
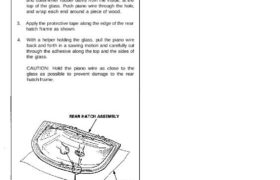
3. Apply the protective tape along the edge of the rear
hatch frame as shown.
4. With a helper holding the glass, pull the piano wire
back and forth in a sawing motion and carefully cut
through the adhesive along the top and the sides of
the glass.
CAUTION: Hold the piano wire as close to the
glass as possible to prevent damage to the rear
hatch frame.
